Internet security is a topic that receives more attention every day. If you’re reading this article in early 2018, issues like Meltdown, Specter and the Equifax breach are no doubt fresh in your mind.
Cybersecurity is a massive concern and can seem overwhelming. Where do you start? Where do you go? What do you do if you’re a small application team with limited resources? How can you better engineer your projects with security in mind?
Tackling the full gestalt of this topic, including OWASP and more is beyond the scope of this article. However, if you’re involved in a small front end team, and if you leverage services like AWS, have gone through the OWASP checklist and are wondering, ‘what now?’, this article is for you (especially if you are developing in NodeJS, which we’ll focus on in this article).
Let’s Talk About Co(de) Dependency:

We’re talking about claiming dependents right?
One way we can quickly impact the security of our applications is through better dependency management. Whether you develop in Python, JavaScript, Ruby or even compiled languages like Java and C#, library packages and modules are part of your workflow.
Sure, it’s 3rd party code but that doesn’t mean it can’t have a major impact on your project (everyone should remember the Leftpad ordeal from just a few years ago).
As it turns out, your app’s dependencies can be your app’s greatest vulnerability.
Managing Code you Didn’t Write:
Below, we’ll outline some steps you can take to tackle at least one facet of secure development – dependency management. In this article, we’ll cover how you can implement a handful of useful tools into a standard NodeJS project to protect, remediate and warn against potential security issues you may introduced into your application via its dependency stack.
We’ve all had to deal with other people’s problematic code at one time or another
Using Dependency-Check:
Even if you’re not using NodeJS, if you are building any project that inherits one or more libraries, you should have some form of dependency checking in place for that project.
For NodeJS apps, Dependency-Check is the easiest, lowest-hanging fruit you can likely reach for to better secure your development process.
Dependency-Check is a command-line tool that can scan your project and warn you of any modules being included in your app’s manifest but not actually being utilized in any functioning code (e.g. modules listed in your package.json file but never ‘required’ in any class within your app). After all, why import code that you do not require?
Installation is a snap. From your project directory you can:
Npm install –g dependency-check

dependency-check package.json –unused
If you have any unused packages, Dependency-Check will warn you via a notice such as:
Fail! Modules in package.json not used in code: chai, chai-http, mocha
Armed with a list of any unused packages in hand, you can prune your application before pushing it to production. This tool can be triggered within your CI process per commit to master or even incorporated into your project’s pre-commit hooks to scan your applications further upstream.
RetireJS:
‘What you require, you must retire’ as the saying goes – at least as it does when it comes to RetireJS. Retire is a suite of tools that can be used for a variety of application types to help identify dependencies your app has incorporated that have known security vulnerabilities.
Retire is suited for JavaScript based projects in general, not just the NodeJS framework.
For the purpose of this article, and since we are dealing primarily with the command line, we’ll be working with the CLI portion of Retire.
npm install -g retire
then from the root of your project just do:
retire
If you are scanning a NodeJS project’s dependencies only, you can narrow the scan by using the following arguments:
retire —nopdepath
By default, the tool will return something like the following, provided you have vulnerabilities RetireJS can identify:
ICanHandlebarz/test/jquery-1.4.4.min.js
↳ jquery 1.4.4.min has known vulnerabilities:
http://web.nvd.nist.gov/view/vuln/detail?vulnId=CVE-2011-4969
http://research.insecurelabs.org/jquery/test/
<a href="http://bugs.jquery.com/ticket/11290">
http://bugs.jquery.com/ticket/11290</a>
Retire scans your app and compares packages used within it with an updated online database of packages/package versions that have been identified by the security world as having exploitable code.
Note the scan output above identified that the version of jquery we have imported via the ICanHandlebarz module has a bug that is exploitable by hackers (note the link to CVE-2011-4969 – the exploit in question).
Armed with this list, we can identify any unnecessary dependencies within our app, as well as any exploits that could be utilized given the code we are currently importing and using.
NSP:
There are a multitude of package scanning utilities for NodeJS apps out on the web. Among them, NSP (Node Security Platform) is arguably the most popular.
Where the previously covered Retire is a dependency scanner suited for JavaScript projects in general, NSP, as the name implies, is specifically designed for Node applications.
The premise is identical: this command line tool can scan your project’s package manifest and identify any commonly known web exploits that can be leveraged given the 3rd party packages you have included in your app.
Utilizing NSP and Retire may sound redundant but, much like a diagnosing a serious condition via medical professional, it’s often worth seeking a second opinion. It’s also equally easy to get up and running with NSP:
npm install -g nsp

nsp check —reporter <Report type (e.g. HTML)>
Running the above within the root of your node application will generate a report in your chosen output format
Again, wiring this up into a CI job should be straightforward. You can even perform back-to-back scans using both Retire and NSP.
Snyk:
Yes, this is yet another dependency scanner – and like NSP, another one that specifically NodeJS oriented but with an added twist: Snyk.
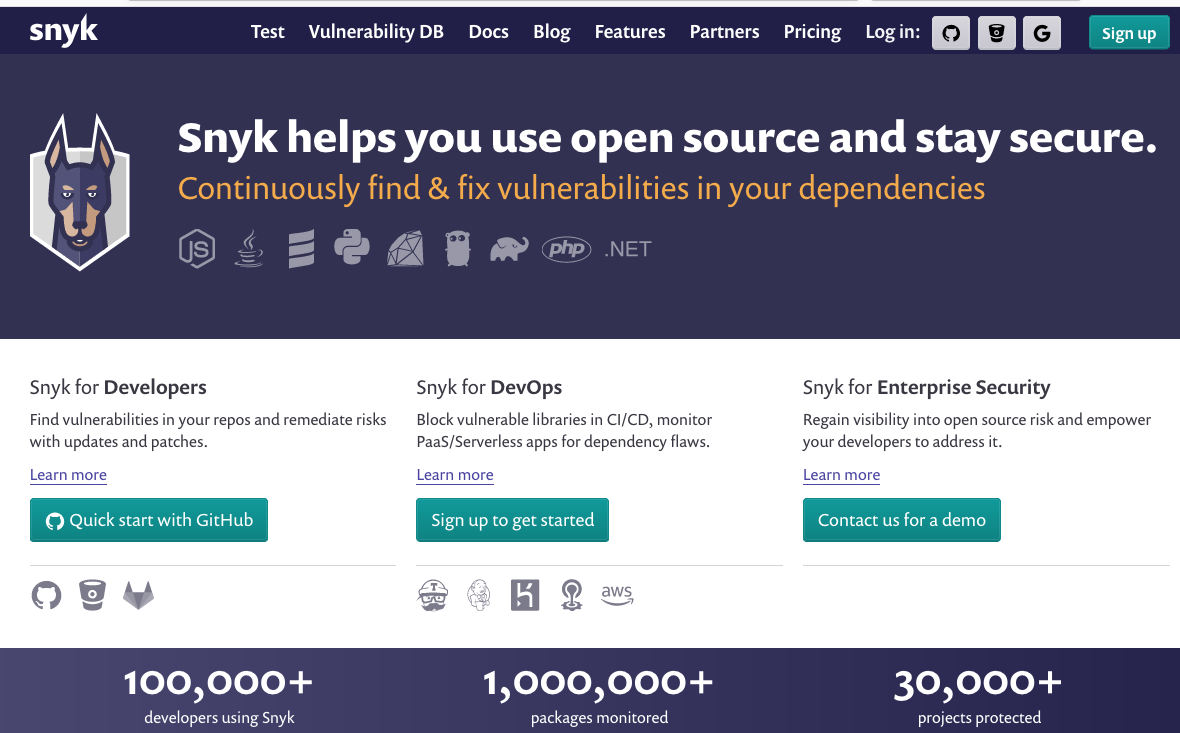
Snyk home page
With Retire and NSP, we can quickly and freely generate a list of vulnerabilities our app is capable of having leveraged against it. However, what of remediation? What if you have a massive Node project that you may not be able to patch or collate dependency issues on quickly? This is where Snyk comes in handy.
Snyk can generate detailed and presentable reports (perfect for team members who may not be elbow deep in your project’s code). The service also provides other features such as automated email notifications and monitoring for your app’s dependency issues.
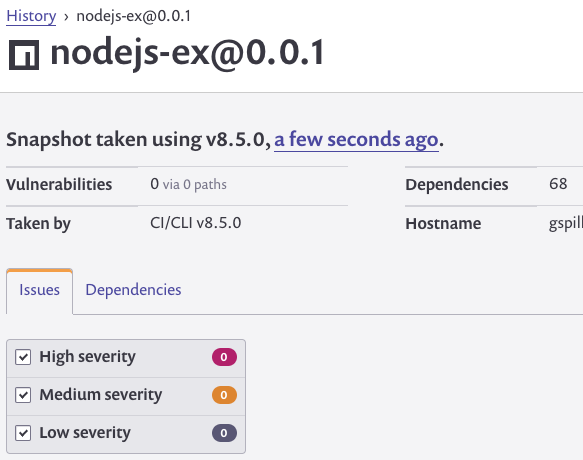
Typical Snyk report
Cost: Now, these features sound great (they also sound expensive). Snyk is a free service, depending on your app’s size. For small projects or open source apps, Snyk is essentially free. For teams with larger needs, you will want to consult their current pricing.
To install and get running with Snyk, first visit https://snyk.io and register for a user account (if you have a private or open source project in github or bitbucket, you’ll want to register your Snyk account with your code management tool’s account.
Next, from your project root in the command line console:
npm install -g snyk

snyk –auth
Read through the console prompt. Once you receive a success message, your project is now ready to report to your Snyk account. Next:
Snyk test
Once Snyk is finished you will be presented with a URL will direct you to a report containing all vulnerable dependency information Snyk was able to find regarding your project.
The report is handy in that it not only identifies vulnerabilities and the packages they’re associated with but also steps for remediation (e.g. – update a given package to a specific version, remove it, etc.).
Snyk has a few more tricks up its sleeve as well. If you wish to dive headlong into securing your application. Simply run:
Snyk wizard
This will rescan your application in an interactive wizard mode that will walk you through each vulnerable package and prompt you for actions to take for each vulnerable package.
Note, it is not recommended to use Snyk’s wizard mode when dealing with large scale applications due to it being very time consuming.
It will look like this:
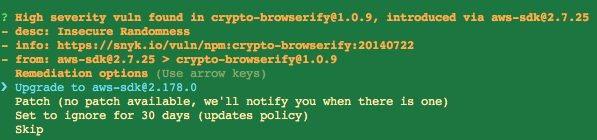
Snyk monitor output
Additionally, you can utilize Snyk’s monitoring feature which, in addition to scanning your application, will send email notifications to you or your team when there are updates to vulnerable packages associated with your project.
Putting it all together in CI:
Of course we’re going to arrange these tools into some form a CI instance. And why not? Given we have a series of easy-to-implement command line tools, adding these to part of our project’s build process should be straight forward.
Below is an example of a shell script we added as a build step in a Jenkins job to install and run each of these scan tools as well as output some of their responses to artifacts our job can archive:
#Installs our tools
npm install -g snyk
npm install -g dependency-check
npm install -g retire

#Runs dependency-check and outputs results to a text file
dependency-check ./package.json >> depcheck_results.txt

#Runs retire and outputs results to a text file
retire --nodepath node_modules >> retire_results.txt

#Authenticates use with Snyk
snyk auth $SNYK_TOKEN

#Runs Snyk's monitor task and outputs results to a test file
snyk monitor >> snyk_raw_monitor.txt

#Uses printf, grep and cut CLI tools to retrieve the Snyk report URL
#and saves that URL to a text file
printf http: >> snykurl.txt
grep https snyk_raw_monitor.txt | cut -d ":" -f 2 >> snykurl.txt
cat snykurl.txt

#Don't forget the set your post-job task in your CI service to save the above .txt
#files as artifacts for our security check run.
Note – depending on how you stage your application’s build lifecycle in your CI service, you may want to break the above script up into separate scripts within the job or separate jobs entirely. For example, you may want to scan your app using Dependency-Check for every commit but save your scan of your application using NSP or Snyk for only when the application is built nightly or deployed to your staging environment. In which case, you can divide this script accordingly.
Note on Snyk:
In order to use Snyk in your CI instance, you will need to reference your Snyk authentication key when executing this tool (see the API key reference in the script).
This key can be passed as a static string to the job. Your auth key for Snyk can be obtained by logging in at Snyk.io and retrieving your API key from the account settings page after clicking on the My Account link from Snyk’s main menu.
Next Steps:
This is only the tip of the iceberg when it comes to security and web application development. Hopefully, this article has given you some ideas and hits of where to start in writing more secure software. For more info on how to secure your Node-based apps, here’s some additional reading to check out:
- Security for Web Developers: Using JavaScript, HTML and CSS – John Paul Mueller
- Secure Your Node.js Web Application: Keep Attackers Out and Users Happy – Karl Duuna
- Node.js Security Checklist – blog.ringstack.com